Friends, in our family, vegetable preparations are eaten very quickly. For this reason, I recently became interested in how to store turnips at home so that the harvest lasts longer. I found several ways, I will share them with you.
How To Store Turnips? – Features
Turnip, although it belongs to vegetables, differs from other crops in ways of storage. She has her own characteristics in this matter:
- Root crops can be kept in the same place as other products: they do not absorb foreign odors.
- Turnips store better if the tail is cut into ⅔ parts.
- Before storing the crop, it is better not to wash it, otherwise, it will begin to rot.
- The storage location should be dry, dark, and cool.
- It is better to store specimens without damage, smooth, and with dense skin.
- Late-maturing varieties last longer. Early ripe ones are intended for quick consumption.
Optimal conditions to store turnips
Now let’s talk about the conditions that must be arranged for turnips. Here are the highlights:
- Temperature. The desired indicator is from 0 to 3 degrees Celsius. It will be lower – the vegetables will freeze and, with a subsequent increase in temperature, will become watery. If the indicator is higher, then the turnip will begin to dry out and wrinkle.
- Air humidity. For this culture, an indicator of 85-90% is needed. You can measure yourself with a special device – a hygrometer. To increase humidity, put a couple of containers with clean water in the room.
- Ventilation. The place of storage should be able to carry out ventilation so that stale air does not form, which will contribute to the development of pathogenic bacteria.
- Lighting. Direct sunlight, and indeed any sunlight in general, is best minimized: in the sun, the crop will begin to dry out, and the pulp will lose its juiciness. So it is the darkness that is ideal for turnips.
And, of course, the quality of the fruit is an important condition for long-term storage. Pay attention to such points:
- Root crops should be ripe and weighty enough so that there is no void inside.
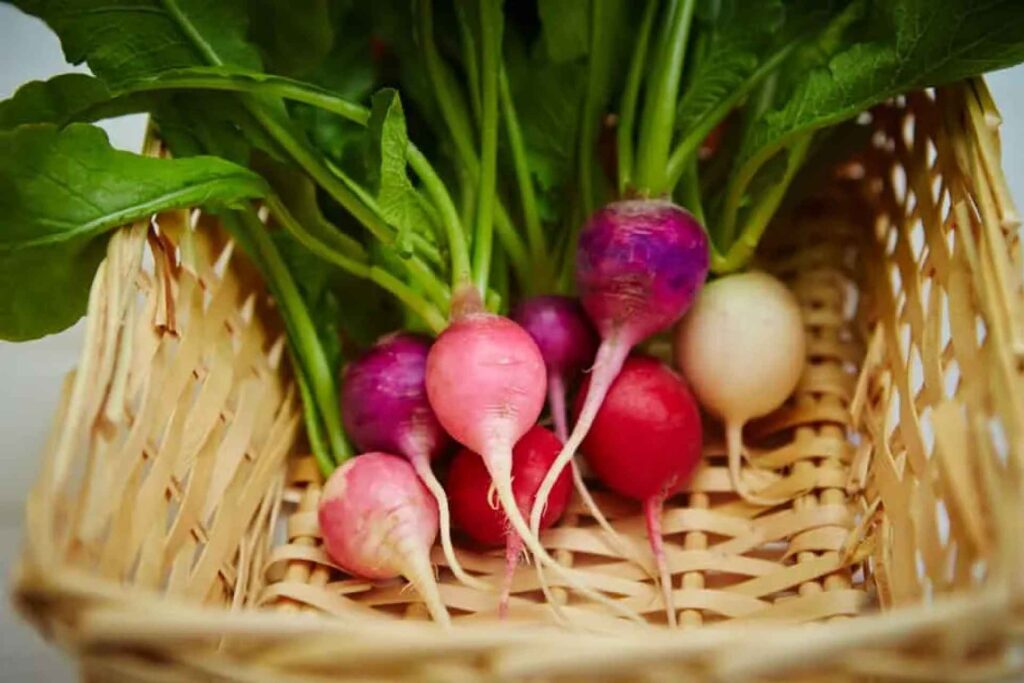
- Color. Turnip is yellow and white. In the first specimens, the pulp will be juicy and fleshy, but the dietary fiber will be coarse. In white varieties, the aroma is not very pronounced, but there are no hard fibers and the pulp is softer. These are stored less.
- Size. It is best to take medium-sized fruits. Small ones may not yet be fully ripe, and large ones – with bitter.
- Appearance. There should be no damage on the surface: cracks, chips, or rotten places.
How to store turnips at home
There are many ways to store turnips for the winter in an apartment. I have chosen for you the most common and effective ones that I myself use.
In a refrigerator
The easiest way is to store turnips in the refrigerator. Here you will not spend a lot of effort. Here’s what to do:
- Sort out the roots. Leave only completely whole copies.
- Clean the vegetables from dirt and dust with a dry cloth or sponge. If you can’t delete everything, don’t worry. Wash immediately before use.
- Put it in the refrigerator (in the compartment for vegetables).
In this state, the turnip is stored for 30 days. You can increase the shelf life if you wrap each fruit:
- plastic bag;
- paper or newspaper;
- food film.
In this case, the duration of storage will increase by another 5-10 days.
Freezing turnips for the winter
You need to save the crop for a long time, then use the freezer. You will have to spend a little effort on the preparation process, but in this case, turnips can be stored throughout the year.
So I freeze like this:
- First, I cut off the top of the head with a green bunch and soak the turnip in warm water for 20-30 minutes so that the dirt comes off better.
- I rinse under running water.
- I remove the skin with a special knife for vegetables. I cut the cleaned product into cubes (you can grind it into any other form convenient for you).
- I start blanching. To do this, I pour water into two pots. I put one on fire, and I throw a couple of ice cubes into the other.
- I put the turnip pieces into boiling water. I boil for 2 minutes. Then, with a slotted spoon, transfer to cold water for 5 minutes. I take it out and put it in a colander so that all the liquid is glassed.
- I dry the pieces with a kitchen towel. This procedure allows you to preserve the taste characteristics and beneficial properties of turnips after freezing.
After drying, arrange the cut vegetables in hermetically sealed containers or tight plastic bags. In the first option, make sure that there is about 1.5 cm of free space on top. Try to release all the air from the bag, and only then tie it up and put it away for storage.
So that during the defrosting process, the turnip does not lose its taste characteristics and elasticity, first place it in the refrigerator for a couple of hours, and then just put it at room temperature. This will keep the turnip pieces juicy and firm.
Turnip drying
Another way to prepare turnips is to dry them. There is only one minus of this method: you have to be at home all day to monitor the readiness of the product, unless, of course, you are drying in the sun. First, the fruits need to be prepared:
- Wash the turnip, and peel it.
- Cut into thin plates (thickness should not exceed 5 mm, otherwise the slices will not dry out and deteriorate).
- Put in boiling water for 30 seconds. Remove with a slotted spoon into a colander to drain any excess liquid.
- Lay on a paper towel to dry for 1-2 hours.
Drying options
After such preparation, you can choose one of the following options for drying:
- Oven. To do this, cover a baking sheet with parchment paper and place chopped vegetables on it. In this case, the plates should not touch each other. Put in the oven, preheated to 50-60 degrees, for 10-12 hours. Periodically check the readiness, as depending on the power of the oven, the turnips may be cooked earlier.
- Electric dryer. Everything is even simpler here: put the pieces on the trays and select the function for drying vegetables on your unit. This method will take about 12-14 hours. At the same time, change the trays every 2-3 hours (put the top ones down, and vice versa) so that all the pieces dry evenly.
- In the sun. To do this, place the slices on a baking sheet and place them in a sunny place. Cover the top with gauze so that insects do not run over the slices. Leave it like this for 4-6 days. turn the pieces from one side to the other every day.
After drying, remove the turnips in cloth bags or glass jars and place them in a dark and cool place. The shelf life in this state is up to six months.
In clay
For those who want to eat fresh turnips, I suggest using clay for storage. It will prevent wilting of fruits and keep them from diseases and pests. For this method you will need:
- Make a clay pot. Diluted in proportion: 2 parts of clay to 1 part of water. The result should be a thick mass of creamy consistency.
- Wash the turnip in water, and dry it so that no moisture remains on the surface.
- Dip each root vegetable into a clay mash. Be careful: the mass should cover the entire surface of the vegetable.
- Then dry in the fresh air so that the clay layer completely hardens.
- Arrange turnips in wooden boxes in 2-3 layers, laying gauze folded in several layers between them, or some other soft cloth.
- Keep in a dark and cool place.
- In this state, the culture will remain in a usable state for 6-8 months.
In the vegetable pit
Storing turnips in a vegetable pit is suitable for those who have a private house with a plot of land. I had the opportunity to organize such storage, so I will share my experience:
- I chose a dry place on a site with porous soil. She asked her husband to dig a ditch 70-80 cm deep.
- At the bottom put a layer of straw. She distributed the turnips on it so that the root crops did not touch each other. Covered with sand.
- I made 2-3 more rows on top in the same sequence.
- The rest of the moat was covered with sand. At the same time, he protruded over the hole by 30-40 cm.
- For warming for the winter period of time, I also put a layer of burnt manure on top. It will only need to be removed with the onset of a thaw.
In sand or ash bags
You can also store root crops in bags with wood ash or sand. All you have to do is layer the turnips in the bag, pouring layer after layer of sand (slightly dampened) or ash. After you need to remove such a blank in the basement or cellar (or another cool and dark place).
Before storing the fruits in this way, they do not need to be washed, otherwise, mold can quickly appear.
Preservation at room temperature
At room temperature, you need to choose the right place for turnips. It should be dry and dark. If the sun’s rays fall on vegetables, they will quickly begin to fade and change their taste. If these two characteristics are observed, turnips at home will remain for up to 7 days.
Let me summarize
After defrosting, turnips should be consumed or cooked immediately: it quickly loses all their taste.
If the fruits are bitter, then you can cut them and put them in salted water for a day. This will help get rid of bitterness.
The choice of root crops for storage should be taken seriously since the shelf life depends on the quality of the turnip.
So, now you know how to properly store this vegetable at home. It remains only to apply the knowledge gained in practice and harvest now.